Documentation Contribution
dnb-web docs
This website is built using Docusaurus 2, a modern static website generator.
Local Development
Install dependencies with pnpm
$ pnpm i
Then start the dev server:
$ pnpm start
This command starts a local development server and opens up a browser window. Most changes are reflected live without having to restart the server.
Build
$ pnpm build
This command generates static content into the build directory and can be served using any static contents hosting service.
You can also serve this built content locally using this command:
$ pnpm serve
Documentation Guidelines
Format
All documentation are written in markdown format, with either an .md or .mdx extension. You may use docusaurus markdown features to make your documentation richer.
Core
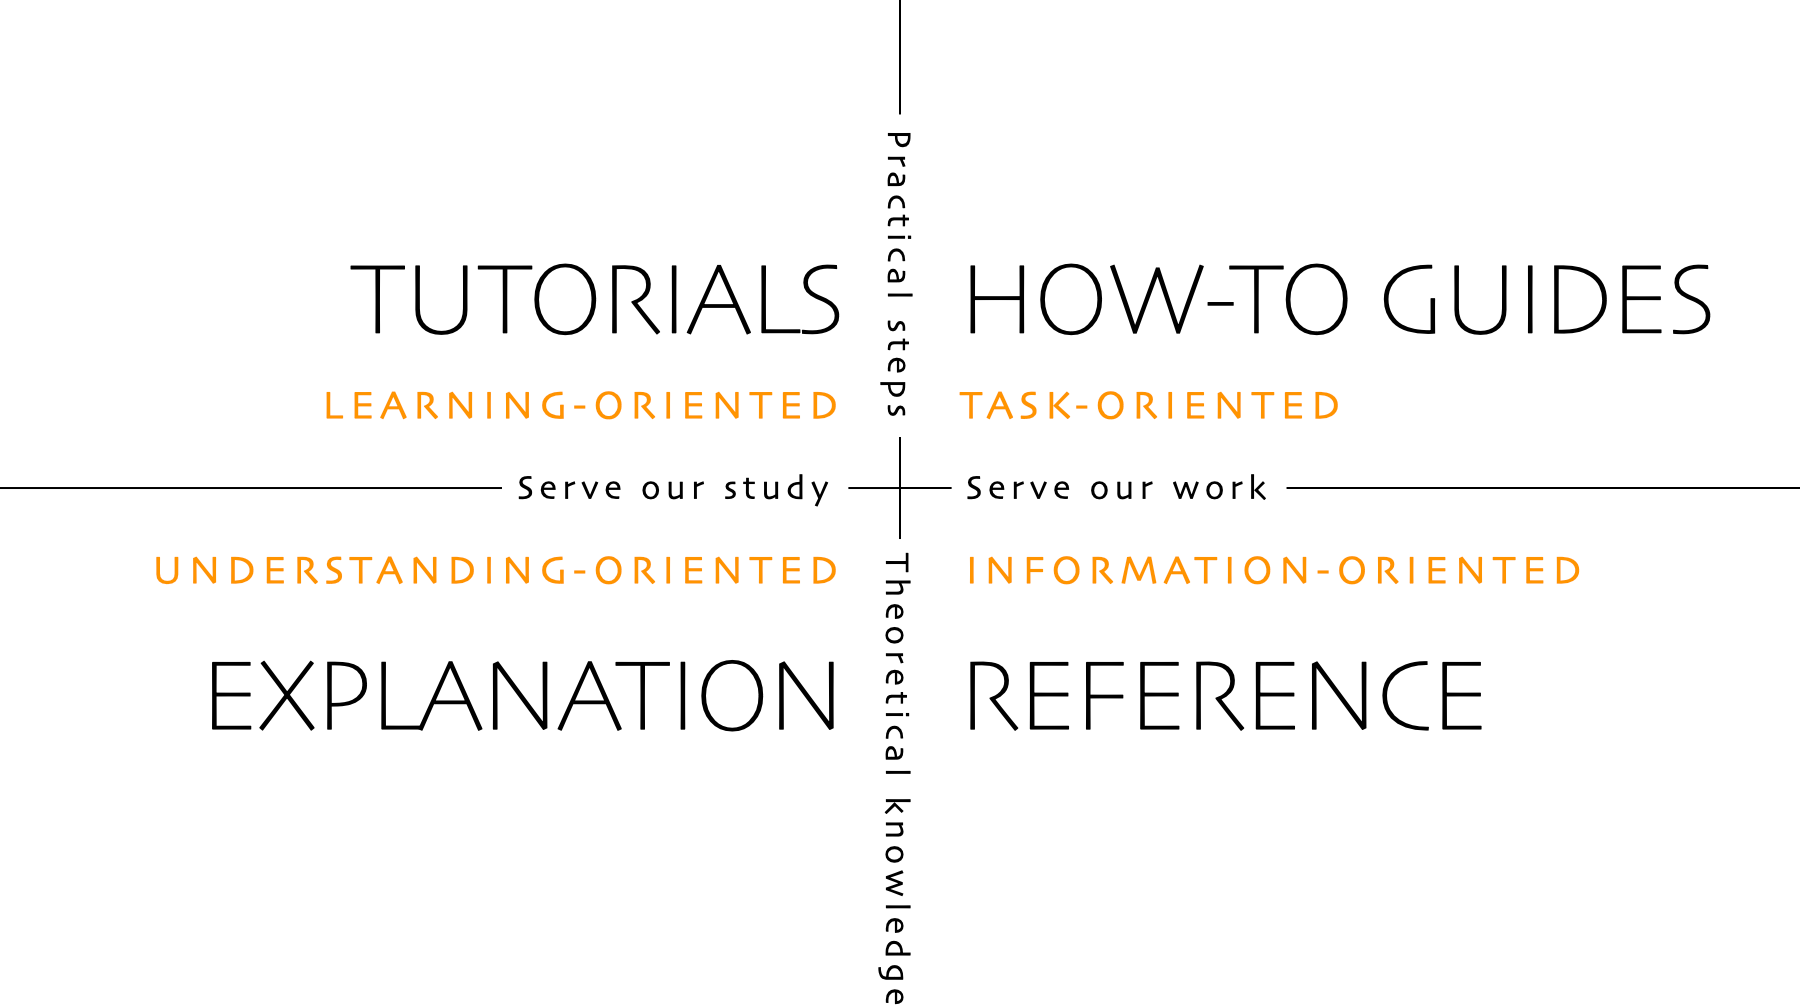
The core section follows the diátaxis documentation structure.
- Tutorials are step by step instructions which helps the user learn.
- How-to guides are practical instructions which helps the user to accomplish tasks while they are working. These core sections fall under this category:
- Workflow
- Migration
- References are in depth information about specific topics
- Explanation or discussion is a section that we have not created yet in the core section

In order to keep our documentation organized, we should keep this chart in mind to determine where to put a new documentation you are creating. Learn more about this structure by visiting their page or watching this youtube video.
File organization
The core section top folder section corresponds to the previously mentioned structure.
docs/core
├── Migration
│   └── migrating-pm-netbank-apps
│       ├── migrating-in-dnb-web
│       │   └── replacing-shared-libraries
│       └── preparation
├── Reference
│   └── AppConfig CLI
├── Tutorials
├── Workflow
│   └── develop
│       └── Feature Flags
└── assets
Sidebar
The sidebar is automatically generated based on the folder structure. When you create a new document, place it in the appropriate folder. If you are writing documentation for a big topic, break it down into smaller markdown files and create a new folder to group them into one topic. You can customize how this folder will be rendered in the sidebar by creating a _category_.yml file:
position: <sidebar position>
label: <Sidebar label>
collapsed: <boolean>
Table of contents
Docusaurus automatically creates a table of contents on the right side for each this page. To make sure that this is properly generated, use markdown headers (prefixed with #, ##, ###) accordingly.
There is no need to create a new table of contents anywhere else other than this autogenerated one.
Index file
In order to create a landing page for a collapsible section (folder), an index.md should be added to each folder. To include a list of all pages in the folder, add a DocCardList in the markdown file:
import DocCardList from '@theme/DocCardList';

<DocCardList />
Sidebar Ordering
To control the order of a page on the sidebar, use the sidebar_position front matter at the beginning of a markdown file:
---
sidebar_position: 1
---
Code snippets
All sample code should be inlined and surrounded by a code block using triple backticks, with language and title specified:
```json title="package.json"
{
    "name": "@dnb/docs,
    "version": "1.0.0"
}
```
This will ensure that the code is syntax highlighted and that docusaurus will render them properly in both light and dark themes, with a copy button overlay. Do not share code as a screenshot.
Diagrams
In order to be compatible with both light and dark theme, diagrams should be added as static SVG files or be rendered inline using mermaid.
Example inline diagram using mermaid:
```mermaid
graph LR
    A --> B
    B --> C
```
which will be rendered as:
Screenshots
If you must share a screenshot such as when sharing parts of a web UI, activate the dark theme of that web UI before taking the screenshot. Dark screenshots work better in both light and dark themes than a light one does.