CI/CD
This guide explains our CI/CD pipeline and walks you through the guidelines for deploying your application
Pipeline description
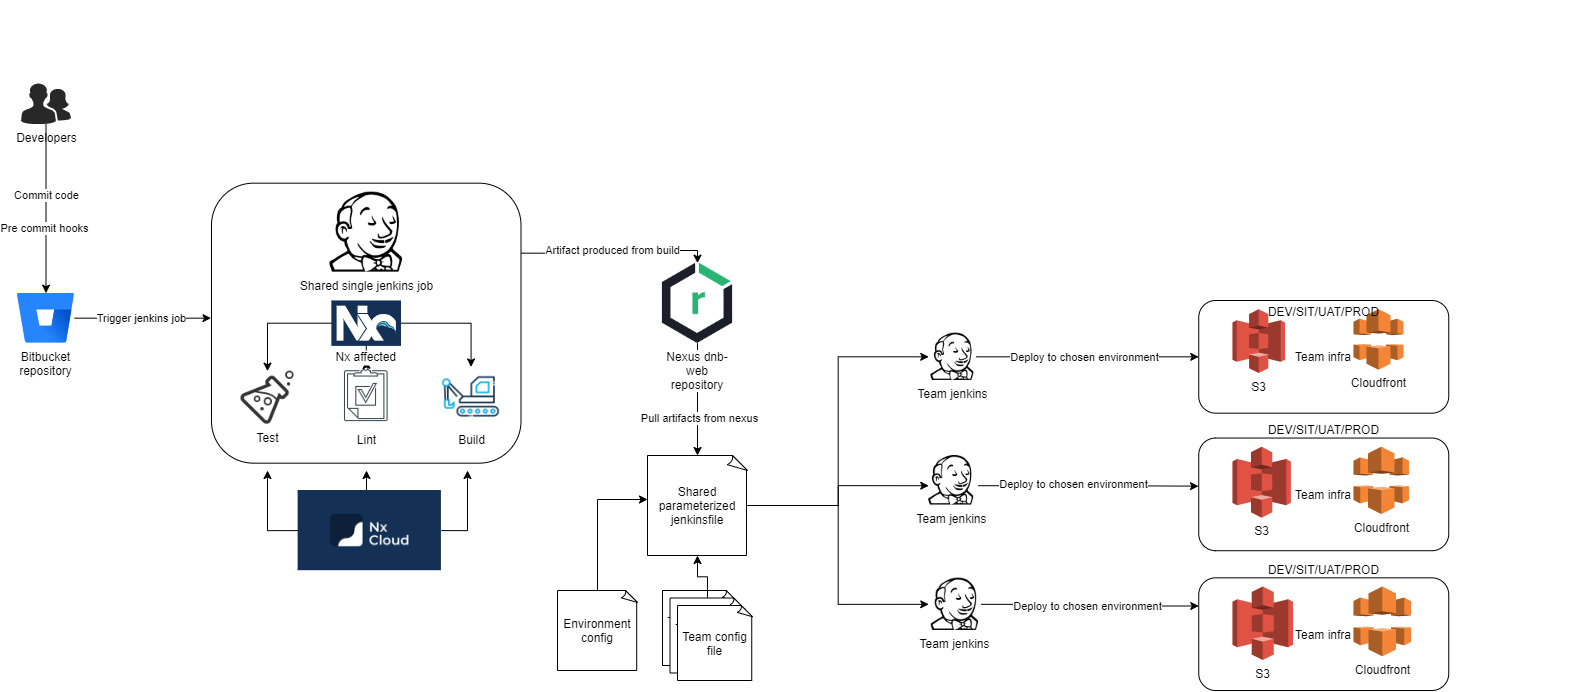
Steps
- Developer commits code changes, this triggers the jenkins job
- Using
nx affectedthe jenkins job tests, lints and builds the applications affected by the new code changes. - Every app that has changes and a
build-artifactandupload-artifactstep defined for their root app inproject.jsonwill be built and the resulting artifact will be uploaded to nexus. This will most of the time be a root app, but we also support deployment of standalone react apps. - A second jenkins job for deployment can be manually started in jenkins by choosing an environment and a version to deploy.
- The built artifact is pulled down from nexus
- A script will replace environment variable placeholders with their correct values based on environment selected.
- The jenkins job will get the correct config for the app from
deployConfig.jsondefined in the app's folder. - The jenkins job will use the config to deploy the application to the correct S3 bucket(s).
- You will see your application deployed at your team's cloudfront URL.
Configure your app
When the pipeline runs the build step, it will run the following 3 commands. How to configure them is explained later in the documentation.
pre-build: Runs before the build.build-artifact: Builds the deployable application, you will need to add this to your app inproject.jsonThis naming helps us build only the apps we want to deploy and not all applications as they will be included by the root-app.upload-artifact: Runs after the build. Here we run the nexus upload.
Nexus upload
The Jenkins job will run test, lint and build for affected apps on every commit.
Apps that have a build-artifact and upload-artifact step will be built and uploaded to nexus.
You should also have a pre-build step defined to enable environment variables.
Every app has a test, lint and build step defined automatically, but if you want to upload to nexus, add the following to your app in project.json.
APP_FOLDER should be the folder for your app. For example corporate/root-app.
If your app has a different build output folder than public, add DIST_FOLDER=<outputfolder> after APP_FOLDER. (The dist folder is relative to the app root)
    "pre-build": {
      "executor": "@nrwl/workspace:run-commands",
      "options": {
        "command": "make -f upload_nexus.mk generate_env_placeholders APP_FOLDER=<namespace>"
      }
    },
    "build-artifact": {
      "executor": "@dnb/gatsby:build",
      "options": {
        "outputPath": "apps/corporate/root-app/public",
        "uglify": true,
        "color": true,
        "profile": false,
        "prefixPaths": true
      },
      "configurations": {
        "production": {}
      }
    },
    "upload-artifact": {
      "executor": "@nrwl/workspace:run-commands",
      "options": {
        "command": "make -f upload_nexus.mk package upload APP_FOLDER=corporate/root-app"
      }
    }
This will result in an artifact with the name <namespace>-appName uploaded to nexus. For example corporate-root-app.
The name is taken from APP_FOLDER with the / replaced with -.
If your app is a standalone react app and you're using NX's React configuration to build your app, you need to point it to the .env.cicd in your build-artifact command. You can do this by setting envFile inside options.
Here's an example from savings-and-investments-pob-web
"build-artifact": {
  "executor": "@nrwl/workspace:run-commands",
  "options": {
    "commands": [
      "nx build savings-and-investments-pob-web --configuration=production",
      "nx run savings-and-investments-loader-script:build --skip-nx-cache"
    ],
    "parallel": false,
    "envFile": "apps/savings-and-investments/pob-web/.env.cicd"
  }
},
Upload from lib folder
If developing a common component that should be deployed on its own (e.g. the loader script), you will need to add LIB_FOLDER in stead of APP_FOLDER.
Version prefix
If you need to include additional information in the artifact version, you can add a prefix by using VERSION_PREFIX=build-123- during package and upload steps.
"upload-artifact": {
  "executor": "@nrwl/workspace:run-commands",
  "options": {
    "command": "make -f upload_nexus.mk package upload APP_FOLDER=corporate/root-app VERSION_PREFIX=build-123-"
  }
}
This would prefix the version part of the artifact with build-123-: <app-name><version-prefix><version>
Controlled packaging
If your application deployment artifact differs from the standard "dist" folder deployment, you can configure packaging with a list of files to be included and excluded, using package_explicit instead of the normal package target.
Create includes and excludes files in apps/<namespace>/<application>/deploy called artifact.excludes.txt and artifact.includes.txt
// in apps/dce-openpages/root-app/deploy/artifact.includes.txt

apps/dce-openpages/root-app
tools
// in apps/dce-openpages/root-app/deploy/artifact.excludes.txt

node_modules
tools/config
Configure the upload-artifact architect target
"upload-artifact": {
  "executor": "@nrwl/workspace:run-commands",
  "options": {
    "command": "make -f upload_nexus.mk package_explicit upload APP_FOLDER=dce-openpages/root-app"
  }
}
This would instead make an artifact containing all files from apps/dce-openpages/root-app and tools except those in the excludes file.
Environment variables
We have a script that takes variables defined in a gui-config.yaml file and generates placeholders for them in a env.cicd file. The build then replaces any variables you use in your app from process.env with the placeholders.
When the app is deployed the placeholders are replaced with the values defined in the gui-config.yaml file.
Steps to enable environment variables
-
A
gui-config.yamlfile in a deploy folder in your root app's directory (For exampleapps/corporate/root-app/deploy/gui-config.yaml). This file should contain the values for the variable in all environmentsExample
gui-config.yamlfile:variables: dev: GATSBY_API_URL: https://apix.dev.ccp.tech-03.net/dev/pim sit: GATSBY_API_URL: https://apix.sit.ccp.tech-03.net/sit/pim uat: GATSBY_API_URL: https://apix.uat.ccp.tech-03.net/uat/pim
-
A
pre-buildstep added to<namespace>/root-appinproject.jsonExample:
"pre-build": {
  "executor": "@nrwl/workspace:run-commands",
  "options": {
    "command": "make -f upload_nexus.mk generate_env_placeholders APP_NAME=<namespace>"
  }
}, -
For local development you can define environment variables in an
.env.localfile.
Note that the naming of the variables in the examples are not optimal, and should be namespaced to your team
You can then access the variables in your applications like this like this: process.env.<YOUR_VARIABLE_NAME>
Note that all variables need to start with GATSBY. For example GATSBY_YOUR_VARIABLE
Deployment
We have defined one shared Jenkinsfile that every team can use.
To make use of it, you need to create a jenkins job in your team's Jenkins instance.
This job needs to be named after the following naming scheme: dnb-web-deploy_<namespace>_artifactName.
For example dnb-web-deploy_corporate_root-app for a root app or dnb-web-deploy_corporate_someapp for a standalone app.
We use the name of the job to determine which config we should use to deploy your app, so the deployment will NOT work if you do not follow the exact job naming scheme.
You then need to define a deployConfig.json in a deploy folder in your app's directory. (For example apps/corporate/root-app/deploy/deployConfig.json)
It should look like this:
{
"dev": {
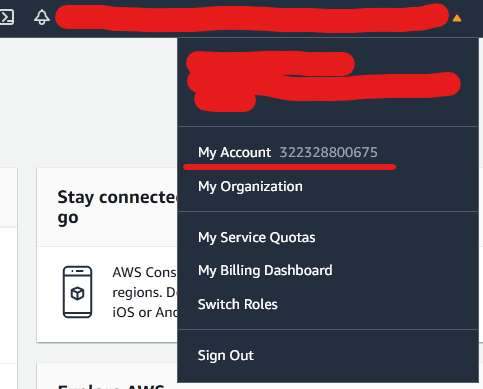
"accountId": "322328800675",
"bucketId": "cpp-dev-cf-s3",
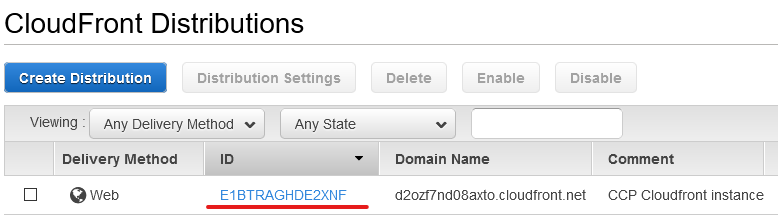
"cloudfrontId": "E1BTRAGHDE2XNF",
"bucketFolder": "corporate",
"region": "ew-west-1"
},
"sit": {
"accountId": "863662566681",
"bucketId": "ccp-sit-cf-s3",
"cloudfrontId": "EWYNU17MB8EKZ",
"bucketFolder": "corporate",
"region": "ew-west-1"
}
}
accountId is the id of your team's AWS account.
bucketId is the id (name of the bucket) of the S3 bucket you want your app to be deployed to.

cloudFrontId is the id of your cloudfront instance
bucketFolder will be the name of the folder in your S3 bucket the app should be deployed to. You can leave it as an empty string if you want to deploy to the root of your S3 bucket.
Creating a jenkins job for deployment
The jenkins file will handle most of the work, but you will need to define a jenkins job for your team's app.
- Go to your jenkins instance and create a new
pipelinejob - Check the
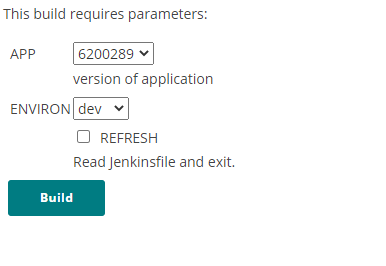
This build has parameterscheckbox - add a
Choice ParametercalledENVIRON. Give it the possible valuesdevsituatandprod(add each in a new line in the choices textbox) - add a
Boolean ParametercalledREFRESH. Give it a description likeRead Jenkinsfile and exit. - Navigate to the Pipeline options at the bottom
- Choose
Pipeline script from SCMas thedefinition - Choose
gitas thescm - Paste in the repository URL
https://bitbucket.tech.dnb.no/scm/dnbno/dnb-web.git - For
credentialschoosejenkinsreaduser - Leave
Branches to buildas is - Set
Script pathtodeploy/Jenkinsfile - Click save
- Navigate to
Build with parameters, check theRefreshcheckbox and click build. Jenkins should now run the job to setup the rest of the parameters. - Go back into the job configuration. You should now have some extra parameters defined. Hit save and your job should be ready! 🥳
- If you navigate to
Build with parametersagain, it should look like this: